


")


Semi-automatic carbines have become enormously popular. Applications range from law enforcement and home defense to competitive target shooting and hunting. The most popular platform is the AR15-based weapon chambered for 223 Remington. But if you visit your local shooting range, you will find AR-style carbines, circa the 1960s, shooting alongside historical battle-rifle actions made popular in the 1940s.
For this evaluation we acquired three different solutions to the self-defense rifle equation, mixing midrange and top-of-category power choices with 6.8s and 308s. In the AR15 platform, we started with a 308 Winchester-chambered Armalite AR10 A4C carbine, $1502. Against that bigger, but still familiar, design, we pitted a similarly-familiar M1A variant in the form of Springfield Armorys $2090 Socom II AA9627 with black fiberglass stock. To this mix we added a midrange-power 6.8mm Remington SPC Ruger KMini-6.8/5P, $894.
How We Tested
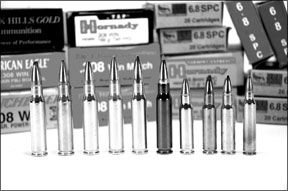
Choice of 6.8 SPC test ammunition was limited. We chose 110-grain V-max rounds from Hornady and two different rounds from Silver State Armory, ssarmory.com. They were the 110-grain Pro Hunter and the 115-grain Match King. On the 30caliber side, our choices were more complex. After initial tests we found that the M1A platform and the AR platform performed very differently depending on ammunition. In short, the Armalite preferred lighter bullets, and the Socom II performed better with heavier bullets. We decided that it would not be fair to test with rounds that we knew would limit the ability of one gun or the other, so we tested with a greater variety of ammunition than we normally use. Our 308 Winchester test ammunition consisted of Federals American Eagle 150-grain full-metal-jacket boattails, Winchester 150-grain Power Points; Black Hills Gold 155-grain Hornady A-Max cartridges, Hornady 168-grain TAP FFDs, Black Hills 168-grain boattail hollowpoints, and Black Hills 175-grain boattail hollowpoints.
We performed two firing sessions, one for accuracy and another for fast-action capability that featured multiple targets at close range. For our accuracy tests we fired from the 100-yard line at American Shooting Centers in Houston (amshootcenters.com). We usually test carbines from a distance of 50 yards, and the guns sights were suitable for that. The Ruger and Springfield Armory carbines arrived with iron sights, and the Armalite featured a rail atop the receiver and another shorter rail above the gas block perfect for mounting a set of removable sights.
But because the 308 Winchester is widely used for precision rifle applications, and the 6.8s ballistics make it suitable for those ranges as well, we fitted the trio with a Leupold Mark 4 3.5-10X40mm LR/T No. 60010 long range-tactical scope, which had a mil-line reticle with illumination on demand (leupold.com).
The chore of zeroing the 30mm-tube Leupold for three different guns was no chore at all. Adjusting for windage and elevation were as simple as working an Etch-a-Sketch. Mounting a scope on our Socom II did produce a challenge. The Socom II AA9629 has an extended top rail that reaches over the chamber and all the way back to the rear sight. But our AA9627carbine was set up with a rail that did not reach fully across the receiver. So, we had few options. One was to remove the stripper clip bracket and mount a longer mount. Another was to utilize a long-relief scope. To mount our Leupold, we resorted to using an extension mount.
For our rapid-action session with the KMini, we mounted the Prismatic scope on a suitable rail, the Weigand Combat Ruger Rifle scope mount ($50) from brownells.com. The manufacturer recommends installation by a qualified gunsmith, and we second that recommendation. Two pitfalls await the amateur. The right rear set screw is difficult to tighten down without special tools. Attempting to preset tension can leave the mount off center. Another problem was setting the depth of the locator pin that fits into the notch in the top strap. Too shallow and the pin can collapse or deform, subtracting from the strength of mount. But with the addition of the mount many more sighting options were available.
For our bench session we turned the Leupolds power up to 10X, and for close-quarters shooting we reduced magnification. Using the technique of bracketing targets at shorter distances, we framed the torso between the mil lines, making the scope more flexible. Our close-quarters tests consisted of a series of six-shot strings of fire wherein we engaged three IPSC Metric targets, originally referred to as Milparks. The Milpark is a corrugated cardboard target representing a human torso and head measuring about 30 inches top to bottom. Target placement was mapped with the central target 45 feet downrange. The left-side target was 20 feet downrange, and the right-side target was 30 feet away. Each peripheral target was about 12.5 feet from the center line. Our routine was to begin with our long gun at low ready, come up on the target and attempt to place two shots on each target as fast as possible. We fired left to right, right to left and working from nearest target to farthest target, then back again. We werent looking to collect timed data, instead we wanted to learn more about the guns than a bench session or plinking could tell us. For this portion of the test, we tried each gun with their supplied sights as well as with the Leupold Prismatic 1X14 Tactical No. 63300. This is a 1X non-magnifying scope that provided a reticle consisting of crosshair and circle. The reticle could be illuminated when desired. Brightness of the circle-plex reticle was variable and could be turned on and off, returning directly to the desired setting. Use of the 1X Prismatic enabled us to put the aiming reticle and the target on the same visual plane. This meant the eyes did not have to work at comparing the front sight to the rear sight and then the target.
As usual, we were looking for a function level of 100% and to see how the gun helped the shooter get the job done. Here is what we learned:
Springfield Armory M1A
Socom II AA9627
308 Winchester, $2090
There are actually nine different variations of this platform in the Springfield Armory catalog, including an urban-camo stock. We likened the visual appeal of the Socom II to a 1950s custom sedan with big fenders and grill. Members of our staff took to calling it the Rocket 88, comparing it to the famous Oldsmobile.
The Socom II is not your fathers M1 Garand. Overall length has been shortened considerably with a 16.25-inch barrel. Our test stock was black fiberglass with a non-skid finish that absorbed glare and was good looking in a tough-guy sort of way. The 20-round magazine was an impressive rectangular casing with Parkerized finish. Garand-like features included the safety,
charging protocol, and the manner in which the magazine was held in place. The Ghost Ring sight was adjustable for windage and elevation. The front sight was an XS-brand sight that included a rectangular tritium insert centered between a hefty set of protective ears. The top rail featured a deep channel to accommodate the sight line between front and rear sight units.
But what dominated our eyes was the array of Picatinny rails mounted on the fore end-Springfield Armorys new Cluster Rail System. The forward portion of the full-length stock was hidden by the Cluster Rail System. The rail system was in two parts. The lower portion of the assembly was heavily vented on the sides, and it offered a 10-inch rail on the bottom. The upper portion of the rail offered a 5-inch rail on each side. The top rail covered the entire distance from the muzzle end of the stock to the forward wall of the chamber. Only 4 inches of barrel protruded from the shroud of the rail system. This included about 1.5 inches of muzzle brake. In all honesty, we thought holding the fore end would be uncomfortable. But when we began shooting the Socom II, we realized that we didnt need to wear gloves to protect our hands after all. The rails werent sharp and didnt dig into our hands on recoil.
In todays weapon designs, there seems to have been a conscious effort to limit the job of the index finger to pressing the trigger. But our index finger was busy with an extra dose of caution because the Socom IIs safety moves from inside the trigger guard for safety-On to outside the front of the trigger guard for ready to fire. The substantial bolt featured an operating handle on the right side, which we found was placed perfectly for being pulled back and released by the right-hand trigger finger. This was handy because this design demands manual bolt release. The latch that holds the bolt back was on the left-hand side, but it does not function as a release.
Of our three carbines, this magazine was the easiest to load and, if necessary, strip off rounds. It looked the strongest, too. But its easy to be spoiled by the convenient operation of todays AR carbines. Dropping the magazine was not achieved with the push of a button but rather by a lever hanging directly behind the magazine. With a little practice it was easy enough to compress the release lever with the thumb as we grabbed the magazine from the receiver. With the bolt locked rearward, we could see straight through the ejection port and out the magazine well. This was because this rifle was designed to feed from a cluster of ammunition bound by a clip to be loaded from the top. A bracket to guide a stripper clip was mounted above the rear of the chamber ahead of the rear sight.
Described on the springfield-armory.com website as a two-stage military trigger, we liked the Socoms trigger best among our three carbines. This made for a shooting experience that was as enjoyable as it was unexpected when compared to our first impression of this weapon.
Thanks to its 10.4-pound weight (without magazine or scope) and the efficiency of the muzzle brake, the Socom II was a pussycat to shoot. From the bench we only found one variety of ammunition that we were not satisfied with. Firing the Winchester 150-grain Power Point, our groups formed a cluster averaging about 2.7 inches across at 100 yards. With one exception, our remaining supply of ammunition was grouping about 1.6 inches across per five shots. We did, however, conquer the minute-of-angle barrier firing the Black Hills 168-grain boattail hollowpoints. Our tightest group measured only 0.9 inches across. Our average size group firing the Black Hills 168-grain BTHPs was 1.1 inches.
For our action test we fired first with the Leupold MK 4 in place set at the minimum magnification, 3.5X. The key here was to perform a consistent mount to guarantee clarity of visual relief. Also helpful was the small open space where the cross hairs intersected. We should mention that we did not find this feature as usable at 100 yards as we had hoped. But it added greatly to our ability to aim at longer distances and at close targets for a more surgical aim. However, for true close-quarters engagement, it was hard to beat the supplied sights. But we would point out that we would have preferred a front-sight blade that was not square or rectangular in profile. We say this because when working as fast as we could, it was too easy to confuse the protective ears with the front sight. Initially the tritium insert did help distinguish the front sight, but once it was dirty we were faced with three nearly identical vertical planes to choose from. We resorted to making a quick visual check of the sight channel in the rib to set us right. It did not take long to get a feel for aiming the Socom II quickly. Of our three carbines, we think the Springfield Armory Socom II was the most effective weapon at both close and intermediate ranges. Armalite AR-10 A4C Carbine
308 Winchester, $1502
The name Armalite was at one time synonymous with the AR15 rifle. The designation AR10 signifies chambering for 308, and the nickname for A4 is “flat top.” This means that the receiver was topped with an 8-inch-long Picatinny rail rather than a carry handle. There was a matching three-slot 1.5-inch rail clamped over the barrel immediately ahead of the fore end. Armalites clamping gas block provided a sling loop that swung forward and back but did not swivel side to side. The barrel was not free-floating. The fore end, grip, and adjustable buttstock were green. The spec sheet at armalite.com reads that this model is available with green or black furniture.
The finish on the metal was manganese phosphate. While presenting the same overall look of a .223 model, the magazine well was bigger and hungrier looking. The flash hider was longer and looked as though it had been stretched. Two magazines were supplied, one carrying 10 rounds and the other 20 rounds. The rifle version of this model (number AR-10 A4), was fit with a 20-inch barrel. It cost the same amount of money and was otherwise much the same as our test carbine.
The overall feel of the Armalite AR-10 A4C was not much different than most of 223 models weve handled. Listed at 9 pounds, our AR10 carbine actually weighed much less, 7.6 pounds. In fact, Armalite lists the 223 Remington M15 A4 carbine as weighing 7 pounds, just 9 ounces less than our 308 Winchester model.
We think weight was important because muzzle rise and recoil were problems when we shot this gun. The heavy bullets and substantial powder charge behind each round is what slowed us from shot to shot in our action tests. The naked surface of the buttstock might be okay for someone wearing body armor, but we chose to wear a shoulder pad. A rubber pad for the butt stock would have been another solution, and we would recommend it.
Mounting the Leupold Prismatic did help us speed up. This scope did not have long eye relief, but we found that mounting the Prismatic so that the ocular lens was approximately 3 inches from the eye was ideal. This gave us a clean look downrange with little or none of the units exterior in view. We used one of the three supplied spacers to elevate the scope above the receiver for better access to the charging handle and a heads-up shooting position.
In terms of reliability we suffered two failures to feed. One was during our bench session, and the other during our rapid-fire session. In each case the 20-round magazine was in place loaded with American Eagle ammunition. The first instance happened early, and we tried adding more oil on the chance that the gun was still new and running dry. A tight extractor might also cause this type of failure. But since none of the other ammunitions we fired failed to feed, we think it may have been due to the ammunition.
For landing multiple shots on target at close range we would have preferred a single-stage trigger. The supplied two-stage trigger tempted us to stop momentarily and stage the trigger before each shot. The quality of the trigger was good, but we thought it favored the marksman rather than the entry team. Therefore, we were surprised when our careful shots from 100 yards did not produce the accuracy we desired. The Armalite AR-10 A4C favored the Hornady TAP FFD ammunition. Firing the Hornady our best average group was about 1.6 inches across. All other rounds produced groups in the 2.5-inch range. In each case we had to struggle to avoid flyers and wondered why.
Our setup began with a Caldwell Tack Driver bag. This heavy X-shaped bag trapped the fore end between two 10-inch ears with a non-skid surface. The operators strong hand held the grip, and the weak hand was folded beneath the stock squeezing a beanie bag. We discovered what we think was the source of our inconsistent hits when moments before letting off a shot the view through the scope suddenly shifted downward. Upon inspection we discovered there was an inordinate amount of play between the top end and the bottom end. With lock pin firmly in place there was still noticeable movement. Unfortunately, we did not have an Accu-Wedge in our tool box. The Accu-Wedge is a $5 part that slips into place behind the push pin and takes up the slop between the two parts. We cant say for sure this would have solved our problem, but if all it takes is an extra $5 to tighten up a $1,500 dollar weapon, wed gladly pay for it.
Ruger KMINI-6.8/5P 6.8 SPC, $894
The Ruger autoloading centerfire “Minis” are available in nine different models. Most of them are chambered for 223 Remington, but also 6.8 SPC, and 7.62X39. Why are they referred to as minis or miniatures? The answer is likely found in the description found on the ruger-firearms.com website. The Mini-14s, including our test carbine, featured “a Garand style breechbolt locking system with a fixed-piston gas system and self-cleaning moving gas cylinder.” It also had a Garand-style safety and magazine-release lever. The safety moved past the trigger guard instead of through a relief, as in the M1 design, but its operation was nevertheless towards the trigger for safety On and forward out and away from the trigger for safety Off. Placement of the bolt catch was atop the receiver, but like the M1, it required a tug on the bolt handle to release it into battery.
Our Mini was fit with a black synthetic all-weather stock. The stock had a very effective rubber pad attached to the smallish stock. Had we separated the stock from the action, we suspect it would have been feather light. You could feel the weight of the barreled action dominating this small weapon. Overall weight was 6.6 lbs., including a barrel band-mounted front-sight unit with protective ears. The rear sight unit utilized a peep-sight aperture adjustable for windage and elevation. Windage setting was held by a combination windage adjustment and locking set screw. Adjustment was achieved by turning the set screw counter-clockwise from the side you wish to move impact. To bring a shot to the right, you would loosen the screw from the right side. Then, turn the left side screw clockwise to seat the adjustment. The manual indicates that one full turn of adjustment will move point of impact 5 inches at 100 yards. Without a click mechanism or any way of subdividing how much you turned the set screw, adjustment tended to be coarse. But once achieved, adjustment should remain solid. We think elevation adjustment should be attempted first, and once set we would recommend staying with the same ammunition. This is because the process of resetting elevation adjustment could throw windage out of alignment. Elevation adjustment begins with loosening one of the set screws. It is recommended in the manual that one set screw be turned one full revolution so the operator can keep track of its original position. With a set screw loosened, the aperture can then be rotated counter-clockwise for up and clockwise for down in increments of 180 degrees. Again, the process was coarse. The best solution was to mount a scope by attaching the supplied rings to the integral base.
With scope in place we tried our hand at the 100-yard targets. We had the best luck with the Silver State Armory 115-grain Match King ammunition. Our best group measured 1.2 inches across. Overall we averaged a 1.6-inch groups with this ammunition.
In terms of power, the 6.8 SPC rounds were well behind the 308 caliber carbines. Muzzle energy produced by the 6.8 SPC ammunition averaged about 1618 ft.-lbs. The least amount of energy produced by our 30-caliber carbines was about 2226 ft.-lbs. But when compared to four 223 Remington carbines tested in the October 2007 issue of Gun Tests, the KMini 6.8/5P was more powerful by almost 500 ft.-lbs. on average.
To produce our best accuracy we had to master different characteristics than those encountered while firing the Armalite and Springfield Armory products. First, the Mini exhibited a lot of muzzle flip. Just looking at the thin tapered barrel we could tell there wasnt much weight up front. All the movement, including the bolt and piston, was taking place back toward the operator. But what challenged us most was the trigger. However you describe the trigger-two-stage, “Military” two-stage-there just wasnt much feedback to be had. There was no definable amount of take-up, nor was there any clue to a break point. Our initial failures from the bench were ruled by our inability to work the trigger effectively based on traditional rifle techniques. But as illustrated by our near-MOA group, we did find a way to shoot the Mini effectively. Calling up our double-action revolver technique, we were successful by rolling through the press. Once we began moving the trigger, there was no stopping. It was the only way we could overcome the vague, spongy trigger.
Using our double-action revolver-trigger technique, we attacked the CQB targets. We found that the key to firing this gun quickly was to keep the buttstock tight against the body. Otherwise, shots were spread out, most notably higher on the target.
1108-DEFENSE-RIFLES-ACCURACY.pdf
1108-Springfield-Armory-M1A-SOCOM.pdf
1108-Armalite-AR-10-A4C-Carbine.pdf
