The Mauser action is the most used, copied, and reproduced bolt-action in the world. The gun has been a favorite of hunters for more than 100 years, and its reputation was enhanced on the battlefields of World War I.
When you first pick up the Ruger Model 77 rifle, there’s no doubt you are holding a modern version of the old Mauser Model 98. The trigger is that of a modern sporting rifle, and the angle-mounted front receiver mounting screw is unique for a sporting rifle—much less a military rifle. It’s no wonder Ruger decided to emulate the Mauser in many ways. In many ways, the repairs and basics of the two rifles are the same. This is especially true in the area of the extractor.
When you pull the front of the bolt stop straight out from the receiver, this permits the bolt to slip out into your hand. The extractor was one of the Mauser’s strongest attributes, and Ruger followed it closely. While they are similar, bear in mind that Ruger extractors are fitted to Ruger breeches and barrels with exact tolerances. They should never be mistaken to have the same interchangeability that old military Mausers have.
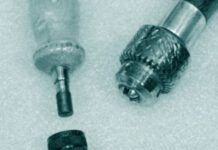
The extractor is removed from the bolt body by driving it forward with a brass hammer or an other object that will not damage it or the bolt body. Broken pieces of wood served this purpose in the trenches of World War I to clean the mud from the battlefield weapon. While an out-of-commission extractor rendered other rifles useless, the Mauser was back in operation in short order.
After removing the extractor, check to see if the extractor band should be removed. If signs of rust appear or it is not turning smoothly around the body of the bolt, you may need to remove it to check out the bolt body. Removing these bands often bends them to the point of damage. Most of the time, it is not necessary to remove them, so when you do, be careful not to spread the lips wider than necessary and always apply the same pressure to both lips at the same time. When the lips are spread about 1/4 inch, you can push down on them and get the point of a small screwdriver under the bottom of the band. Then continue to pull it down and off while carefully opening the lips until the band comes off the bolt body.
The Ruger’s ejector is of the Remington type. This small, round ejector is fitted into a hole drilled into the face of the bolt. This hole is on the far left edge of the bolt face with the bolt in the open position. A spring is mounted into the bottom of the hole, and a slot is cut into the side of the ejector so a retaining pin can hold it in place.
Rust or dirt can cause this type of ejector to stick. They often need to be removed for cleaning and proper oiling. When these become rusted in place, they’re a real problem. Many ejectors of this type have been drilled out, and if not done exactly right, the result is a damaged or destroyed bolt. It’s common to see these in repair shops sitting in cleaners or penetrating oils waiting for the oil to loosen them enough to repair.
Repairing an ejector on the military Mauser simply required replacing the claw-like flat piece of steel that was spring-mounted on the bolt-stop assembly. As the bolt was drawn fully to the rear, this spring-mounted ejector slid down the side of the bolt until it slipped into the slot cut into the bolt, hitting and ejecting the rear of the cartridge. This old-style system has been criticized by many, but it worked well in military rifles. In fact, unless the whole rifle was a mass of rust, not even a rusted extractor could put a Mauser out of business.
Removing the bolt sleeve from the rear of the military Mauser that had the safety on the rear of the bolt was much easier than doing it on the Ruger. On the Mauser, all you have to do is cock the rifle, put the safety on, and unscrew the sleeve from the bolt body. You have to hold in the bolt sleeve stop while doing this, then it is easy to disassemble the firing pin, firing-pin spring, cocking piece, bolt-sleeve stop and its spring.
Disassembling the Ruger requires considerably more effort because there is not a built-in spring retainer. To remove the firing-pin assembly from the bolt, insert a punch or pin into Ruger’s “disassembly hole,” and the firing-pin assembly can be removed from the bolt body. The firing pin must be cocked before beginning. If you use a pin rather than a punch, make sure it is long enough to give you some leverage; you’ll need it while reassembling. Of course, all gunsmiths should take their hats off to Ruger because the Model 77 is not a “do-it-yourself” rifle. If you don’t have the special tool for your Ruger, don’t attempt to take the firing-pin assembly apart. Ruger doesn’t want anyone taking these apart, so the part is a restricted item that they will not sell and will only install at the factory.
If your bolt becomes decocked outside the rifle, you can place a large screwdriver tip against the sear plate at a 45-degree angle and push the sear plate back enough to recock the assembly. Be careful as you hold these all together, because while twisting the bolt back to the recock position, this strong spring can slip away from you. This same process can be used to screw or unscrew the bolt sleeve on or off the bolt body. This is a great way to scratch the bolt, bust your knuckles, and have parts flying across the shop to break up the monotony of an otherwise boring day. Nevertheless, it will work if you are careful.
Removing the stock from the M-77 is different in the fact that the floorplate hinge holds the front receiver screw in place—at an angle rather than straight up and down as in other rifles. The trigger guard comes out like the 700 ADL, with front and rear screws that are straight up and down. The fact that there is nothing holding these parts together, other than the stock, is also different from other rifles. Ruger stresses that it is important to lift their barreled actions out of their stocks on a level plane, not at an angle. As you lift the action out of the stock, be careful not to let the safety link fall out. This is important, because there is nothing but the stock that keeps it in place. While lifting them out, I always turn the trigger up to the left so it will not fall out. The bolt stop has five parts in it, and if you count the stop itself, there are six. These often need cleaning, but unless someone has been brutal to the 77, you will never need to replace any of them.
Ruger has recently introduced a new safety on its rifles, but all previous Ruger M-77 rifles have the thumb safety located at the rear of the tang. This safety button is held in place by the safety link. When the link becomes loose, the safety button will fall out because there is nothing else holding it. The safety-shaft assembly itself is another one of Ruger’s restricted parts. This makes working on the safety a bit touchy, so make sure the removal of the safety retainer or safety spring is done without damage to the safety assembly.
It’s important to note that while you can buy the safety retainer from Ruger, you must send them the entire serial number of the specific rifle it must fit. These are not interchangeable, so this makes it impossible to keep this part in stock. This safety blocks the movement of the trigger housing and sear, creating a very strong safety. Its movement can be adjusted very simply by bending the safety link slightly to make it longer or shorter as needed. Improper adjustment of this link is very dangerous! This link is held in place by the stock, and how it moves against the stock is part of its adjustment. A safety that works perfectly out of the stock can be dangerous in the stock after the stock bolts are tightened.
Resetting the trigger on the 77 is not a simple task, unless you want it long and stiff (then it’s a snap). Ruger says “do not attempt to decrease the weight of pull below this preset minimum,” noting that the triggers are set as light as they can safely be at the factory, and should only be set harder by their three adjustment screws. Since lawsuits have resulted from soft triggers allowing guns to go off before they were supposed to, combined with Ruger’s supersensitivity toward such matters, it is impractical to write about setting their triggers.
So instead of writing about their triggers, let’s consider the following as an imaginary generic trigger. This make-believe trigger has a return spring that the factory says is perfect, and is as light as possible while remaining safe. Any gunsmith who messes with this spring and admits that he did has already lost any lawsuit that may come his way, because the factory has already warned that “any lighter is dangerous.”
On some generic triggers, you might be able to take a small amount off the return spring. Strong springs are not the real reason for poor triggers but, unfortunately, this is the first thing many change to make a good trigger. Triggers need a balance between all its moving parts, and each piece needs to move smoothly and freely. Without this, you will never have a good trigger on any firearm. Some companies state that their triggers should never be taken apart. Our make-believe trigger will be held in place by retaining pins that can easily be driven out with a small punch. By driving out the trigger-pivot pin, the main body of the trigger can now be checked for any type of roughness and be polished smooth—in case the factory did not do it. Sometimes the ends of set screws are not flat, or may be cut at a slight angle or be a little rough. The trigger may be too tight or too loose in the trigger housing, either of which can make a sloppy trigger. The “jake leg” gunsmith says “cut the springs off and the trigger will be softer.” Yes, it will be softer, but it will be dangerous and less reliable too.
This make-believe trigger has an engagement adjustment screw. A good gunsmith wants to set this screw to the perfect compromise of the shooter’s wants and needs, while keeping safety in mind. It should never be set so short on release as to make it unsafe, but at the same time, it should only be as long as needed to keep it safe. For target shooting only, this setting might be the width of a hair, but this would be very dangerous for any other use. The following things must be considered for a properly set trigger: the angle of attack, the width of the bearing surfaces, all spring pressures, and poundages required to hold the sear safely in place. It’s not possible to give a simple rule on how to set this distance; however, I will give you a guideline. Target shooters who never load their guns except when pointed down range should have their trigger set to the point that it will not jar loose with a 10-pound blow. For hunters, set them for a 20-pound blow, and then move it just a hair more for safety sake.
The trigger-adjustment screw should have a 4-pound pull for the average hunter, and if all parts are working smoothly, he will think it is less. Target shooters usually want their triggers light, but don’t get carried away. Their triggers will feel a lot harder in your shop than it will under recoil on the firing bench. My preference in setting the overtravel set screw is just to the point where it clears smoothly without touching. Some say they like overtravel, but keep in mind that once the trigger releases, any excess rearward movement has no resistance to speak of. Whatever pressure is being applied will turn into speed at the point of release. And when it stops instantly, this speed will turn into a jar that, however slight, might pull you off the shot. It will hurt your accuracy, and accuracy is why we are working on the trigger in the first place.
Another major problem with accuracy is how the stock fits the barreled action. There is much debate about Ruger’s front stock screw being set at an angle. The thought here is that the bolt being put in at an angle will not only hold the action in the stock tightly, but will also pull it back into the stock very firmly at the same time. This double pressure contact should make it a better fit, and therefore produce a more accurate rifle. This dual-purpose screw does make it very important to always have the same pressure applied as it is tightened if you expect to get accuracy from this rifle.
When placing the action back into the stock, do the following: First, tighten all three stock screws down until there is no play but they are not tight. Next, tighten the front screw until it is very snug but not completely tight. Then tighten the other screws—but not as tightly as the front screw. Tighten the front angle screw to between 10 to 18 pounds of torque. Finally, you can finish tightening the two rear stock screws. All rifle stocks need to be properly fitted and tightened, but Ruger’s angle mount seems to require more perfection than others. And then again, some Ruger rifles seem to shoot well whatever people do to them, while some are very finicky.
If the Ruger you are working on fails to keep its point of impact the same with each shot—and the problem is not with the shooter or the ammunition—glass bedding is what most gunsmiths turn to. Many good articles have been written about glass bedding, and I will not go into it here except to point out a couple of things that are different about bedding the Ruger. Remember this angle-mount stock bolt pulls the action slightly to the rear as it tightens. This means that if you are using a firm gel fiberglass, it will pull the action away from the bedding compound, not just down into it. This unique movement has also locked some Rugers into a glass-bedded stock, never to be removed again. A second caution concerning fiberglassing the Ruger stock: Never get any fiberglass in the area of the safety link, because the wood fit must remain right for the safety to work properly.
When you work on a Ruger M-77 with sights, you will find that Ruger uses the Williams Gib sight locks on their rear sights. If you’re not familiar with this sight lock, it would be easier for you to slip one out of the Ruger and look at it to appreciate it than it would be for me to explain it. In brief, it is a thick washer cut at an angle so that it grips harder by tightening the sight screw. Its angled edge fits the edge of the dovetail mount and the edge of the dovetail sight. As this screw is tightened, it reduces the size of the dovetail. The one-piece rear sight base is held in place by two screws, while the front sight blades are held by a plunger and spring. Other than this, adjustments and maintenance are routine.
When you reassemble the Ruger, be sure you have the magazine box fully fitted in the receiver—just like on the Remington BDLs. In reassembling the bolt, make sure the lips of the extractor band fit all the way in their respective slots on the underside of the extractor, and push the extractor slowly back onto the bolt. As it reaches its normal position, lift up the front of the extractor away from the bolt face. Then it can pop back where it belongs without damaging its edges or the bolt face.
To put the firing-pin assembly back into the bolt, screw the assembly fully into the bolt, making sure it is properly positioned. It’s correct when the flat on the bottom of the bolt sleeve is aligned with the flat on the bottom end of the bolt handle. There is a shallow notch on the rear end of the bolt in which the nose of the cocking piece fits. It will probably be necessary for you to use the punch or restraining pin you put into the disassembly hole as a lever to work the cocking-piece nose into its notch. At this point, you will be glad you didn’t use a small retainer, because this is a strong spring and is hard to move with a small pin as a lever. If you are working on a Mannlicher-stocked Ruger, don’t forget that the cap screw must be removed before the barreled action can be removed. There are older model Rugers that have some differences. These are serial numbered below 79-50000.


